
How to Size One Headshot for Every Place You Need It
Export a square file for profile placements and a 4:5 file for portrait uses. Keep the full-resolution original and crop each version separately.
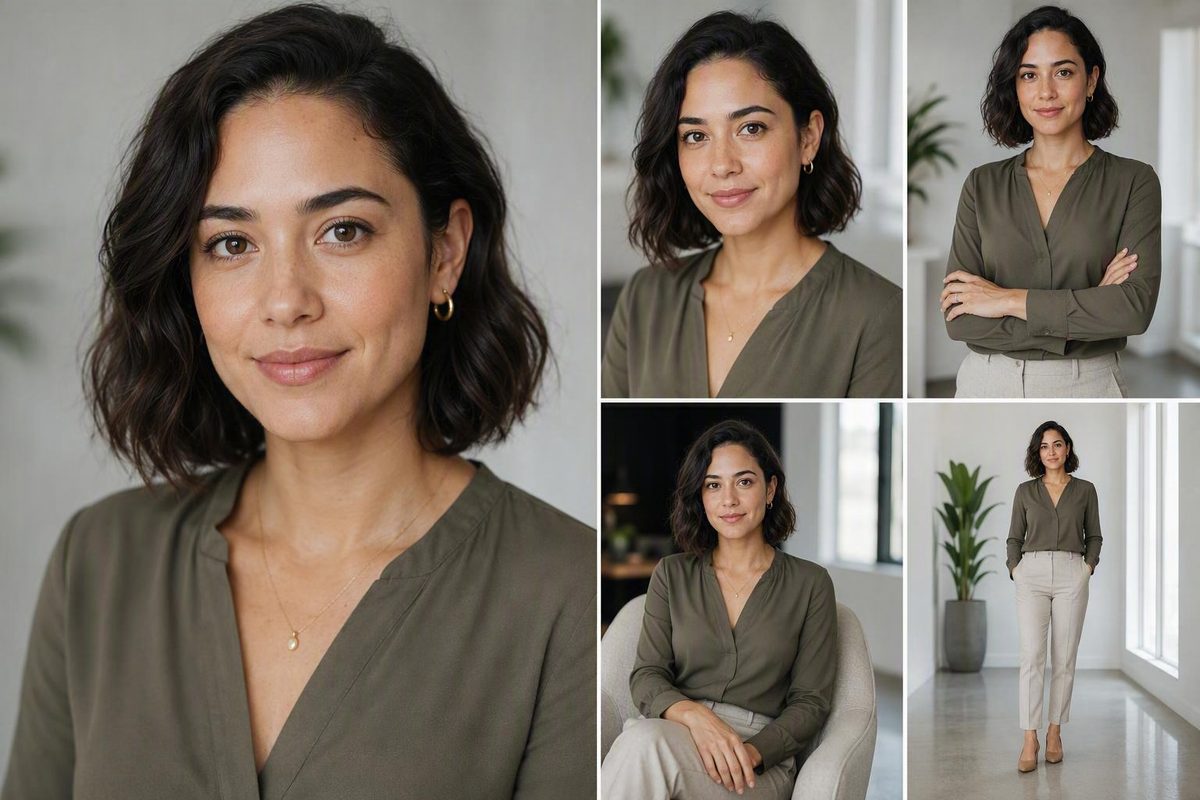
The short answer: choose dimensions by destination
There is no single correct set of headshot dimensions. A LinkedIn profile, employee directory, corporate biography, casting submission, and printed acting headshot can each require a different shape, pixel count, format, or file-size limit.
The reliable approach is to keep the full-resolution original, identify the destination, and export a separate copy for each use. A 1:1 square crop and a portrait-oriented 4:5 crop cover many common placements, but the destination’s current instructions always take precedence.
| Destination | Common aspect ratio | Practical dimensions | Classification | Verification note |
|---|---|---|---|---|
| LinkedIn profile | 1:1 | 400×400 px reported minimum; 800×800 px practical export | Third-party reported minimum plus editorial recommendation | A current commercial guide distinguishes the reported 400×400 minimum from its own 800×800 recommendation and describes a centered circular display crop (Capturely’s LinkedIn photo-size guide). |
| Square company directory | 1:1 | 800×800 or 1000×1000 px | Practical starting point | These are examples, not universal requirements. Confirm the component dimensions and upload limit with the website or communications team. |
| Corporate biography | 4:5 portrait | 800×1000 or 1200×1500 px | Practical starting point | Match the site’s actual component and largest rendered size. |
| High-resolution press portrait | 4:5 portrait | About 2000×2500 px or larger when requested | Request-dependent example | Supply a large file only when a publication or press contact requests one. |
| Acting-headshot print | 4:5 portrait | 8×10 in; 2400×3000 px at 300 PPI | Common acting convention | Verify the printer, agency, or recipient’s instructions. |
| Other professional profile | Often 1:1 | Destination-specific | Common shape, not a universal specification | Check the platform directly because accepted dimensions, formats, and limits can change. |
The distinction between a minimum and a recommendation matters. Several commercial guides report 400×400 pixels as LinkedIn’s minimum profile-photo size. An 800×800-pixel square is a sensible editorial export when the source supports it, but the available evidence does not establish it as an official LinkedIn recommendation.
For websites, 800×800 or 1000×1000 pixels is a practical square starting point. A portrait-shaped biography image might instead use 800×1000 or 1200×1500 pixels. A professional-photographer guide presents these and larger press-image dimensions as use-dependent examples rather than universal standards (Photography Shark’s headshot-size guide).
Social platforms, casting services, agencies, employers, printers, and content-management systems can impose their own requirements. Those rules can change, so check the destination before cropping or exporting rather than relying on a preset saved last year.
Pixels, aspect ratio, print size, PPI, and file size are different
A headshot specification can contain several numbers that describe different properties. Confusing them is a common reason an image is exported incorrectly.
Pixel dimensions describe digital width and height. An image measuring 800×800 pixels has 800 pixels across and 800 from top to bottom. A 1200×1500-pixel image is larger in pixel dimensions and portrait-oriented.
Aspect ratio describes the proportional relationship between width and height, not the total number of pixels:
- 800×800 and 1000×1000 are both 1:1.
- 800×1000, 1200×1500, and 2400×3000 are all 4:5.
- A 4:5 ratio means four units wide by five units high when written width to height.
- The same proportions in landscape orientation are written 5:4.
Changing an image from 800×1000 to 1200×1500 changes its pixel dimensions while preserving its 4:5 shape. Changing it from 800×1000 to 800×800 changes its aspect ratio. That requires cropping, adding canvas space, or distorting the image. For a conventional headshot, cropping is normally preferable to stretching.
Body-framing labels describe something else again. Terms such as classic headshot, half-body, three-quarter, and full-body refer to how much of the person appears. They do not specify the file’s aspect ratio or pixel dimensions. A waist-up photograph, for example, could be delivered as a square, a 4:5 portrait, or another shape.
Physical print size is measured in units such as inches. It becomes connected to pixel dimensions through PPI, or pixels per inch:
Printed dimension in inches × desired PPI = required pixel dimension
For an 8×10-inch print at 300 PPI:
- Width: 8 × 300 = 2400 pixels
- Height: 10 × 300 = 3000 pixels
- Required file: 2400×3000 pixels
For a 5×7-inch print at 300 PPI:
- Width: 5 × 300 = 1500 pixels
- Height: 7 × 300 = 2100 pixels
- Required file: 1500×2100 pixels
The 300-PPI workflow and the resulting 2400×3000-pixel dimensions for an 8×10-inch print are documented in professional photography guidance (Booray Perry Photography’s corporate-headshot crop guide). If a printer specifies another target, use that requirement instead.
Sources and editing applications often use DPI when discussing image files, although PPI more directly describes the relationship between image pixels and printed inches. Embedded DPI or PPI metadata alone does not determine how sharp a photograph looks on a screen. Online appearance depends more directly on the actual pixel dimensions, displayed size, source focus, compression, and platform processing.
For example, changing only a metadata field from 72 DPI to 300 DPI does not add pixels to an 800×800-pixel file. If the file remains 800×800 pixels and appears at the same on-screen size, the metadata change does not create additional facial detail.
Do not use “dimensions,” “resolution,” and “file size” as interchangeable terms:
- Dimensions: 800×1000 pixels
- Aspect ratio: 4:5
- Print size: 8×10 inches
- Print density: 300 PPI
- File size: a KB or MB value determined by the export
LinkedIn and other square profile images
For LinkedIn, prepare a 1:1 square file. Third-party guides commonly report 400×400 pixels as the minimum. An 800×800-pixel export is a practical higher-resolution choice when the original is large enough, but it is editorial advice rather than an official LinkedIn recommendation established by the supplied evidence.
A square JPEG in the sRGB color space is a practical default for a photographic headshot when accepted. PNG may also be suitable, but accepted formats, dimensional limits, and file-size restrictions should be checked in the current upload interface.
The crop matters as much as the dimensions. LinkedIn commonly presents the square upload inside a centered circle. That circle removes the square’s corners, so a technically correct file can still clip the hair, chin, or shoulders.
To make the crop more resilient:
- Keep the face near the horizontal center.
- Leave visible room above the hairline.
- Avoid placing the chin too close to the lower edge.
- Preserve enough shoulder area to prevent an abrupt circular crop.
- Keep essential details away from the square’s corners.
- Preview both the complete square and a centered circular mask.
Do not follow a rigid face-fill or headroom percentage without looking at the portrait. Hair volume, clothing, body angle, and original framing all affect the margin needed. The objective is a balanced display, not compliance with an arbitrary percentage.
The image must also remain readable when shown small. A profile photograph may appear much smaller in comments, search results, messaging interfaces, or directory lists than on the full profile page. At that scale, a distant environmental portrait can make the face difficult to distinguish even when the file contains ample pixels. Favor a clear face-and-shoulders composition and restrained background detail.
Other professional and social services also use square uploads or circular displays. Do not carry over volatile Facebook, Instagram, X, Gmail, or YouTube figures as permanent specifications. Check the destination’s current help documentation or upload interface directly.
Evidence check — August 12, 2026: The LinkedIn figures above remain explicitly qualified as third-party reporting. Before creating an organizational template, verify the current dimensions, accepted formats, file-size limit, and crop behavior in LinkedIn’s own help documentation or upload interface.
Headshot sizes for company websites, team directories, and press use
A website’s design should determine its headshot dimensions—not a generic “web size” preset.
Start by inspecting the actual image component:
- Is it square, portrait, landscape, or displayed as a circle?
- What is its largest rendered width and height?
- Does it become larger on mobile, desktop, a staff-detail page, or in a modal?
- Does the content-management system generate responsive versions?
- Does the site crop automatically?
- Is there an upload limit or required format?
For a square staff directory or profile card, 800×800 or 1000×1000 pixels is a practical starting point. For a portrait-oriented biography or leadership page, 800×1000 or 1200×1500 pixels provides a 4:5 crop. These figures are editorial examples, not universal website requirements; commercial headshot guidance presents similar dimensions while emphasizing that intended use should control the choice (TRG Headshots’ dimensions guide).
A publication or press contact may request a substantially larger portrait. A 4:5 file of roughly 2000×2500 pixels or more can be useful in that situation if the original supports it. Do not create it by enlarging a small directory thumbnail. Return to the full-resolution photograph and export a new copy.
The file should contain enough pixels for its largest intended display, including any high-density presentation the web team intentionally supports. It does not need to be several times larger than the rendered area without a reason. An unnecessarily heavy image can add loading time, while an undersized image may look soft when enlarged.
Organizations should standardize more than pixel dimensions. A directory can still look inconsistent when every file is 1000×1000 pixels but every portrait uses a different face size or crop.
An HR, communications, or web team’s consistency checklist should cover:
- Aspect ratio: one approved shape for each component
- Eye line: similar vertical positioning across portraits
- Apparent face size: consistent scale without forcing every face into an identical percentage
- Headroom: sufficient room around the hair without large variations
- Shoulder crop: similar width and lower crop point
- Pose: compatible body angle and camera height
- Background: consistent color, environment, or treatment
- Color treatment: aligned white balance, contrast, saturation, and retouching
- Output dimensions: one documented pixel size per website component
- Format and color space: standardized for predictable rendering
- File naming: a consistent, maintainable convention
Document one standard for the current directory while retaining the full-resolution originals. If a redesign changes profile cards from square to portrait, the team can create new crops instead of stretching or enlarging the old directory files.
Neither square nor 4:5 is inherently more professional. A square may work better in a compact staff grid; 4:5 may give a biography page more vertical presence and preserve more of the shoulders. The page design and brand system should determine the fit.
Acting, modeling, and printed headshots use different conventions
An 8×10-inch vertical print is a well-established acting-headshot convention, not a rule for every professional portrait. Its width-to-height ratio is 4:5, and printing it at 300 PPI requires a 2400×3000-pixel file.
Backstage’s acting-specific editorial guidance recommends a high-resolution, vertical 8×10-inch headshot. It describes a prominent face-and-shoulders composition cropped around the chest, with the head in the upper part of the frame (Backstage’s acting-headshot sizing and cropping guide). Those conventions apply to acting materials and should not automatically be imposed on LinkedIn profiles, employee directories, or corporate portraits.
A common acting composition includes:
- A prominent face
- Visible shoulders
- A crop around or just above the chest
- The head or eyes near the upper third
- Enough room around the hair and chin to prevent a cramped result
These are composition guidelines rather than immutable technical rules. Expression, hairstyle, wardrobe, and intended role can influence the exact crop.
Modeling materials often require more than one type of photograph. A portfolio or set of digitals may combine a close headshot with wider images showing more of the body. In that context:
- Classic or quarter headshot: generally framed from the mid-to-upper chest upward
- Half-body image: approximately waist-up
- Three-quarter image: extending to around the thigh or, in some usage, the calf
- Full-body image: head to toe
Terminology varies among photographers, agencies, acting contexts, and modeling markets. These labels describe subject coverage; they do not establish an aspect ratio or pixel count. A commercial framing guide likewise notes that modeling portfolios may combine close, three-quarter, and full-body views and that the terminology is not completely standardized (The Light Committee’s framing guide).
Digital casting submissions must be treated separately from prints. A casting portal may impose its own minimum pixel dimensions, aspect ratio, accepted formats, and maximum file size. An agency may also issue requirements that differ from a portal’s general rules. Consult the service or recipient directly rather than relying on figures copied from a photographer’s blog or an old submission checklist.
If the available file is a corporate square crop, do not stretch it into a portrait shape. Return to the uncropped original and make a new 4:5 or submission-specific crop. If the square version has already removed the shoulders or headroom needed for the new composition, only the master—or potentially a new photograph—can solve the problem.
Compose the master image for square, circular, and portrait crops
The most useful headshot is not merely a high-resolution file. It is a high-resolution image composed with enough surrounding space to support several crops.
Retain an uncropped or loosely cropped master rather than making a small, tightly cropped profile image the only saved version. A flexible delivery set contains:
- The full-resolution master
- A 1:1 square profile crop
- A 4:5 portrait crop
- Any additional destination-specific export, such as 2:3, when required
For a reusable master, place the eyes near the upper third, keep the face prominent, include the shoulders, and preserve room above the hairline and below the chin. These are flexible composition guidelines, not platform mandates.
Photographers should capture enough space around the subject to support both a tighter square and a taller portrait. That does not mean every final image needs excessive empty space. It means the original contains enough material to reposition the crop without cutting through the hair, chin, or shoulders.
A crop-overlay workflow makes the trade-offs visible:
- Open the loosely framed master.
- Add a 1:1 square overlay and position it around the face and shoulders.
- Add a centered circular safe-area mask inside the square.
- Compare a 4:5 portrait overlay, which preserves more vertical space.
- Add an optional 2:3 portrait overlay only if a destination requests it.
- Check every version for adequate headroom, chin room, shoulder information, and eye placement.
Remember that 4:5 conventionally means portrait orientation when ratios are written width to height. A 1200×1500-pixel image is 4:5. A 1500×1200-pixel landscape image has the same proportions but is written 5:4.
Circular displays deserve special attention because they remove the square’s corners. A shoulder or hairstyle that fits inside the square can still be clipped by the circle. Centered placement and safe margin are therefore more important than they may appear in a rectangular preview.
Cropping cannot solve every source problem. A new crop or export may be insufficient when:
- The eyes or face are out of focus.
- Motion blur has removed important detail.
- The source has genuinely inadequate pixel dimensions.
- The photograph is already cropped through the hair.
- There is no room around the chin.
- The shoulders needed for a wider composition were never captured.
- Heavy compression has damaged facial texture.
Resizing can redistribute or interpolate existing pixels, but it cannot reliably recreate authentic detail that was absent from the source.
A reliable resizing and export workflow
Use the following workflow whenever you need a new headshot version.
-
Identify the destination. Determine whether the file is for LinkedIn, a staff directory, a biography, a press request, a casting portal, or print.
-
Confirm the current rules. Check the required aspect ratio, minimum or exact pixel dimensions, orientation, accepted formats, color requirements, and file-size limit. If a named recipient requested the image, follow that person’s specification.
-
Start with the original. Use the full-resolution photograph or finished master—not an image downloaded from social media, copied from a website, captured in a screenshot, or saved from a service that generated a compressed preview. An original email attachment may remain intact, but an embedded preview or platform-optimized copy may not.
-
Duplicate the master. Work on a copy or use nondestructive editing so the original remains available.
-
Choose and lock the aspect ratio. Select 1:1, 4:5, or the destination’s required ratio. Locking the ratio prevents accidental distortion.
-
Crop for composition. Position the eyes, hairline, chin, and shoulders deliberately. Preview a circular mask when the square image may be displayed as a circle.
-
Resize to the target pixels. After establishing the crop, set the required width and height. Cropping changes composition and may change the aspect ratio; resizing changes pixel dimensions.
-
Select the format and color space. For many photographic web uses, JPEG in sRGB is a practical default when accepted. PNG may be appropriate when required, but it can create a larger file, and transparency may not render as expected everywhere. TIFF can be suitable when a printer requests it; it is not a universal print requirement.
-
Compress appropriately. Match the destination’s file-size limit. Use enough compression to control storage weight without visibly damaging the eyes, hair, skin texture, or edges. There is no responsible universal KB or MB target for every headshot.
-
Apply output sharpening if appropriate. Moderate sharpening can help at the final output size, but it cannot repair missed focus or severe motion blur.
-
Preview the exported file. Inspect it at its actual display size and at a larger view. The small preview reveals whether the face remains readable; the larger view exposes compression artifacts, halos, blur, or damaged detail.
-
Save it as a new file. Use a descriptive name such as
surname-linkedin-800-square.jpgorsurname-bio-1200x1500.jpg. Do not overwrite the master.
Stretching is not cropping. If you force an 800×1000-pixel portrait to become 800×800 pixels by changing width and height independently, the face becomes wider because the proportions have changed. Instead, crop the portrait to a square and then resize that square to the target dimensions.
Export each final version from the master whenever practical. A sound workflow preserves the master, creates crops nondestructively, and generates fresh destination-specific files.
Before uploading, confirm:
- [ ] Correct destination
- [ ] Current destination requirements checked
- [ ] Correct aspect ratio
- [ ] Correct pixel dimensions
- [ ] Correct orientation
- [ ] Accepted file format
- [ ] Appropriate color space
- [ ] File size within the stated limit
- [ ] Face and eyes appear sharp
- [ ] Hairline, chin, and shoulders have safe margin
- [ ] Circular crop preview checked when relevant
- [ ] Final file inspected at its real display size
- [ ] Master preserved separately
Troubleshoot blur, rejection, distortion, and bad automatic crops
Correct dimensions do not guarantee a correct-looking image. Diagnose the symptom before changing settings.
| Symptom | Likely cause | Remedy |
|---|---|---|
| Upload says the file is too small | Pixel dimensions fall below the destination’s minimum | Re-export from the full-resolution original. Enlarging a genuinely small source cannot recreate missing facial detail. |
| Upload says the file is too large | The destination may be limiting file weight, pixel dimensions, or both | Read the error carefully. Compress the file if the KB or MB value is too high; resize only if the dimensions exceed a stated limit. |
| Image looks blurry online | Missed focus, motion, inadequate pixels at the displayed size, heavy compression, repeated exports, or platform processing | Inspect the master, compare it with the export, and test a fresh file. Do not assume DPI metadata is the cause. |
| Forehead, hair, chin, or shoulders are clipped | A tight source crop or automatic square or circular treatment | Return to the master and create a crop with more margin. Preview the actual display shape. |
| Face looks stretched or compressed | Width and height were changed independently | Restore the original proportions, lock the required aspect ratio, crop, and then resize. |
| Website loads slowly | Image dimensions or file weight substantially exceed the rendered need | Export closer to the component’s actual display dimensions and use appropriate photographic compression. |
| Print looks soft | Too few pixels for the requested physical dimensions and target PPI | Multiply the print width and height by the printer’s target PPI and compare the results with the available pixels. |
| Image looks sharp in the editor but damaged after upload | Platform recompression, conversion, display scaling, or automated cropping | Test a fresh export in an accepted format and inspect the platform’s preview before saving. |
| Required portrait crop removes important content | The available file is already a tight square or lacks vertical space | Return to the uncropped master. If the missing content was never captured, consider a reshoot. |
A “file too large” message is easy to misinterpret. A high-pixel-count image might exceed a dimensional limit, while a detailed PNG might exceed a file-weight limit even at smaller dimensions. Change the factor the destination actually restricts instead of reducing everything indiscriminately.
For blur, compare four stages: the original capture, the edited master, the exported file, and the uploaded result. If the master is already soft around the eyes, changing export dimensions will not restore focus. If the master is sharp but the export is not, inspect resizing, sharpening, and compression. If both are sharp but the upload is soft, platform processing or display scaling may be involved.
The reshoot threshold is reached when the source is out of focus, lacks adequate detail, or was framed too tightly to produce the required crop. A new session may also be the cleanest solution when only a small, compressed website copy remains and the full-resolution original cannot be recovered.
Frequently asked questions
Is 400×400 pixels large enough for a LinkedIn headshot?
Commercial third-party sources widely report 400×400 pixels as LinkedIn’s minimum profile-photo size. It can therefore be sufficient when the file is sharp, properly cropped, and accepted by the current upload interface. An 800×800-pixel square is a practical higher-resolution export when the master supports it, but that is an editorial recommendation rather than an official LinkedIn recommendation established here (InstaHeadshots’ dimensions guide).
Use a centered 1:1 crop and preview it as a circle. Leave enough space around the hairline, chin, and shoulders, and confirm LinkedIn’s current requirements before uploading.
How many pixels are needed for an 8×10-inch headshot?
At 300 PPI, an 8×10-inch print requires 2400×3000 pixels:
- 8 inches × 300 PPI = 2400 pixels
- 10 inches × 300 PPI = 3000 pixels
This is a common acting and print-workflow calculation, not a universal requirement for every printer or professional portrait (Photography Shark’s sizing guide). If the printer requests another PPI target, recalculate using that value.
Should a professional headshot be square or 4:5?
Choose the shape required by the destination.
A 1:1 square is common for LinkedIn, profile cards, and employee directories. A 4:5 portrait is useful for corporate biographies, leadership pages, acting materials, and 8×10-inch prints. Neither shape is inherently more professional.
If you need both, create separate crops from the full-resolution master rather than stretching one export into another shape.
Does a digital headshot need to be 300 DPI?
No. A screen primarily displays pixels. Digital sharpness depends on the file’s pixel dimensions, displayed size, source focus, compression, and any processing performed by the website or platform.
A 300-DPI or 300-PPI setting becomes meaningful when connecting pixel dimensions to a physical print size. Changing only the metadata to 300 DPI does not add detail to a digital image. A portal may nevertheless request a particular metadata value, in which case follow its current instructions.
Can a small or badly cropped headshot be fixed without a reshoot?
Sometimes. If the full-resolution original still exists, you may be able to create a new crop, export more pixels, reduce compression, or restore the correct proportions. A bad automatic circular crop is often fixable by returning to the master and leaving more margin.
A reshoot may be necessary when the original is out of focus, genuinely too small, heavily damaged by compression, or framed so tightly that missing hair, headroom, chin space, or shoulders were never captured. Enlarging a small file cannot recreate authentic facial detail that is absent.
The compact decision rule is simple: check the destination first, preserve the full-resolution original, export a square version for profile placements and a 4:5 version for portrait uses, calculate print pixels by multiplying physical dimensions by the required PPI, and inspect the final crop at its real display size. Current platform, printer, agency, or submission instructions override every general preset in this guide.